Science Fiction & a Whimsical Gallery in a Seattle Office

I usually share transformations we’ve designed for our clients, but this time I get to share our very own office update!
This winter I realized that the RWI team had outgrown its home in our Fremont location and decided it was time to move. I found a sweet little spot in Wallingford (I knew it was meant to be when I realized that we’d be across the street from *both* Archie McPhee AND the Meowtropolitan Cat Cafe!) and sat down to design our new space.
The future RWI headquarters was a completely blank slate. Just a single large room, with a private bath and separate storage area down the hall. I knew it would need to look cute (hey, we are a design company after all), serve my team well, and also give me a private space where I could work and do coaching via Skype.
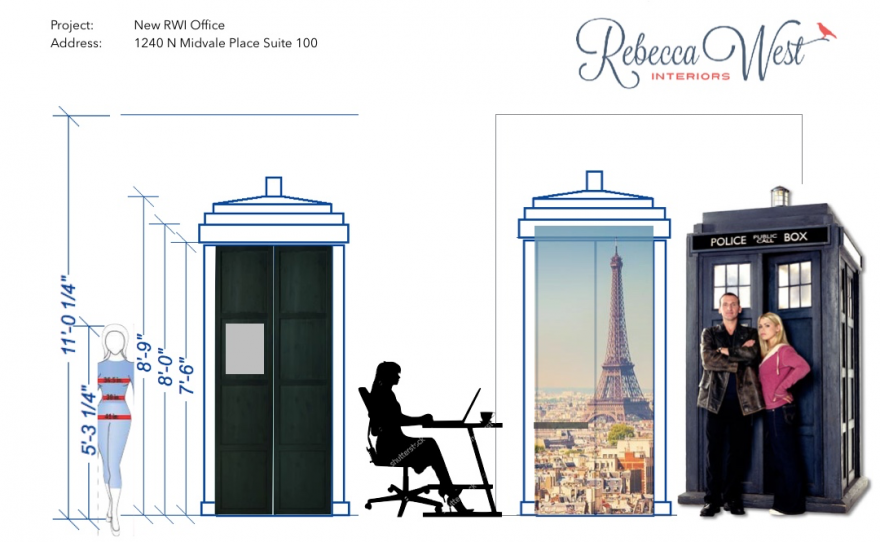
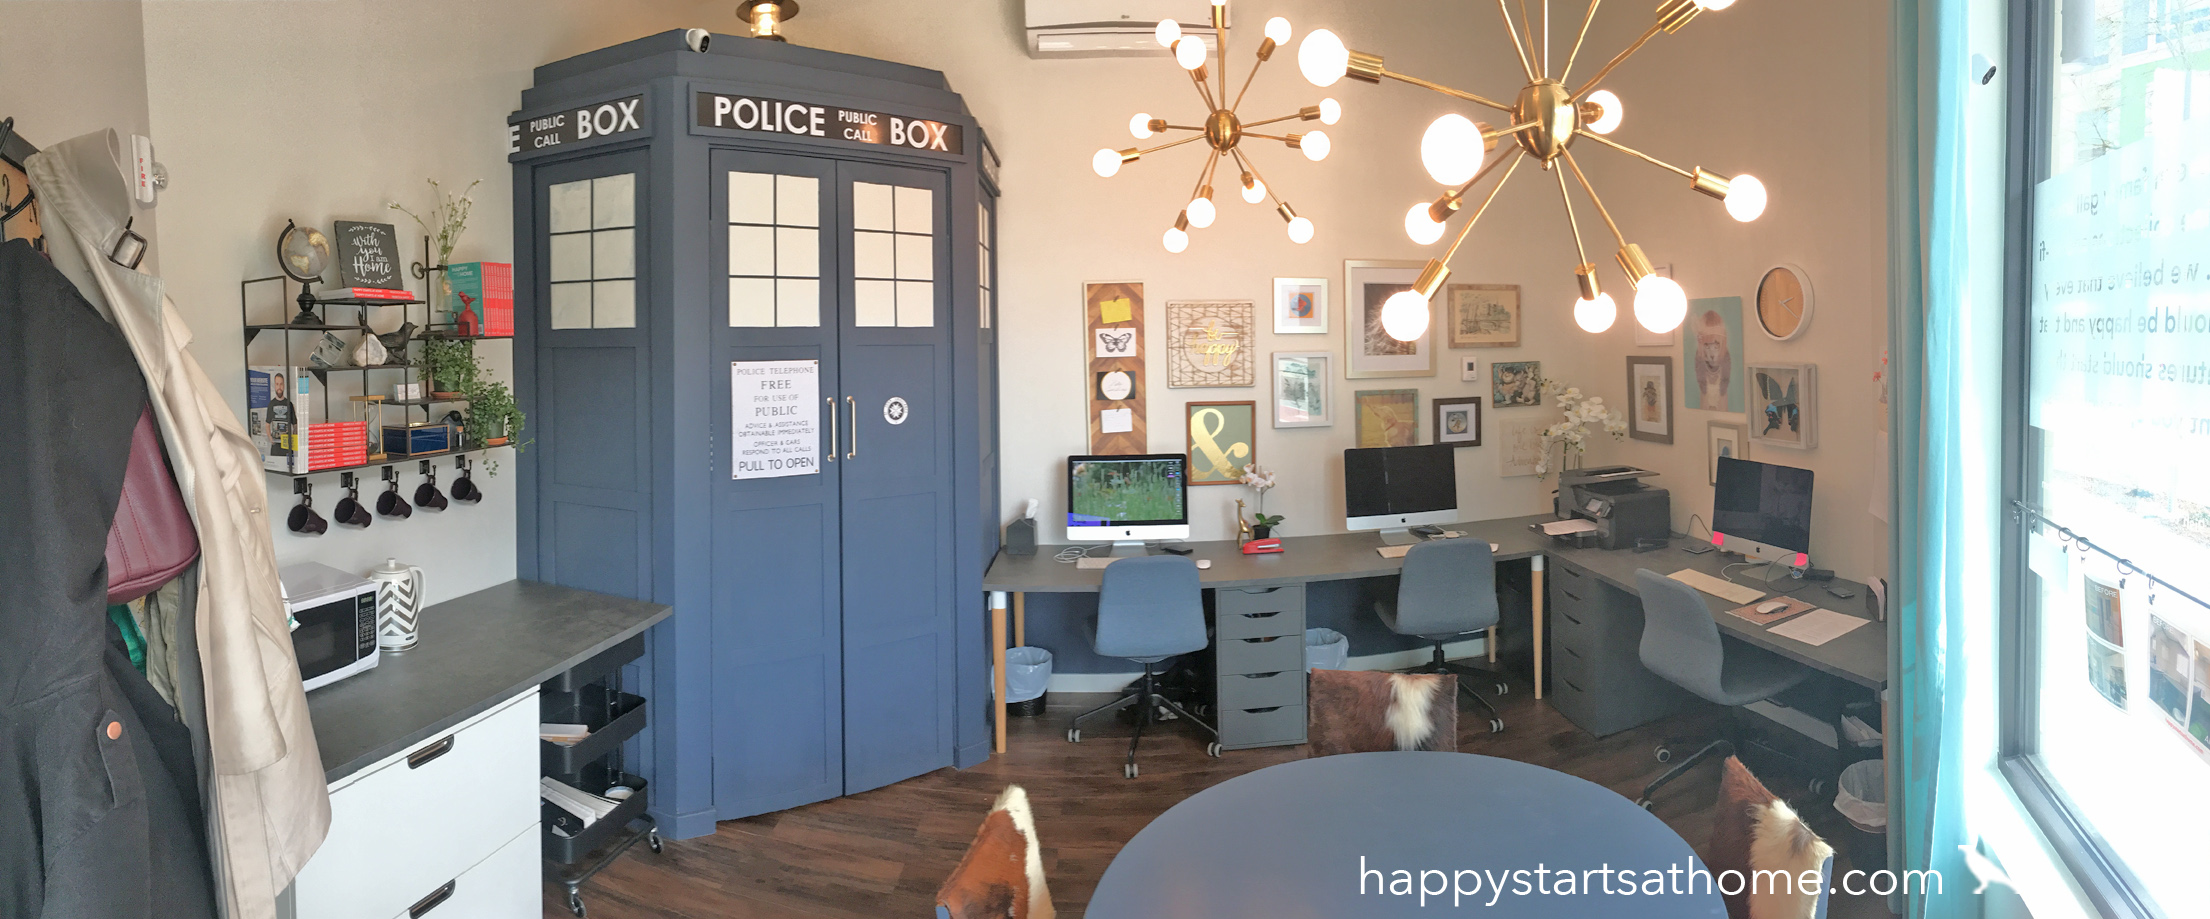
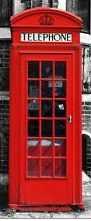 What I needed was a private little phone booth. I thought about creating a red phone booth like you’d see on the streets of London (would have been cute!), but then I had a better idea! Why not build myself a TARDIS?! (For all of you not in-the-know, a TARDIS is a phone callbox that travels through time and space like this!) Why a TARDIS? because:
 #1 I think that people should surround themselves with silly things that make them smile. I knew the TARDIS would make me smile!
#2 because the whole point of the TARDIS is that it is “bigger on the inside” and that is *exactly* what we do – we make small spaces feel bigger on the inside. It was the PERFECT idea!
So I did a bunch of research on proper TARDIS specs, drew out what I wanted, and handed it off to my handy-hubby to build!
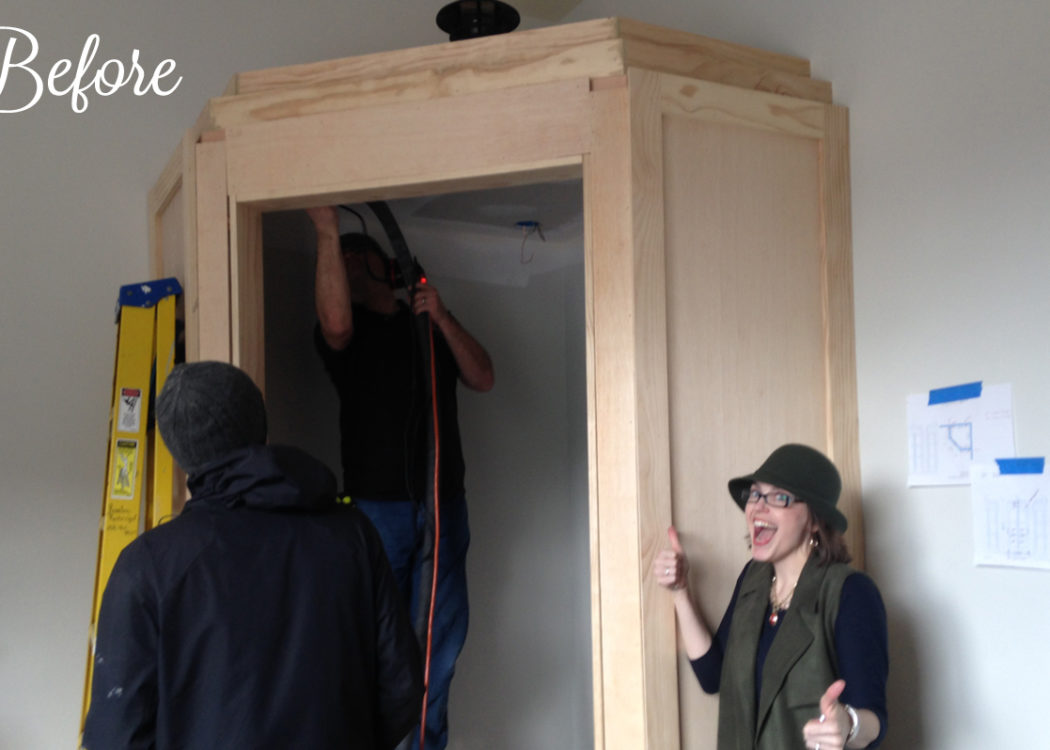
Best office-warming present EVER!
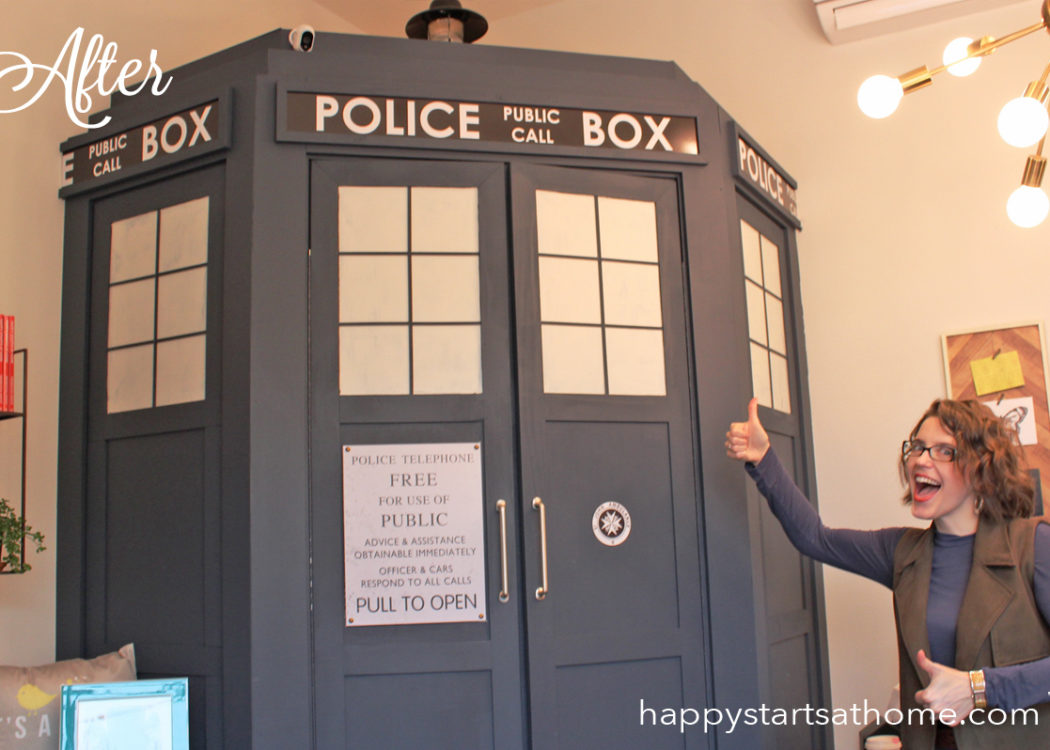
He built it to my specifications and wired up the light on top, then I painted it myself (I chose Benjamin Moore’s Mysterious because I didn’t want the call box to be too intensely blue in our small space), fitted it out with a tin call box sign and St John Ambulance sticker, and got the folks at FastSigns to create the police public call box signs on top.
In the midst of the move we faced all the stress and craziness of any remodel, not to mention some surprise costs, and there were more than a few days working on fold out desks in the middle of a construction zone. But thanks in large part to our awesome-admin Leah’s amazingly upbeat attitude, along with the willingness of my staff to work next door at The Bounty (yes, I bribed them with coffee and hard cider) we made it through with not a day of work lost.
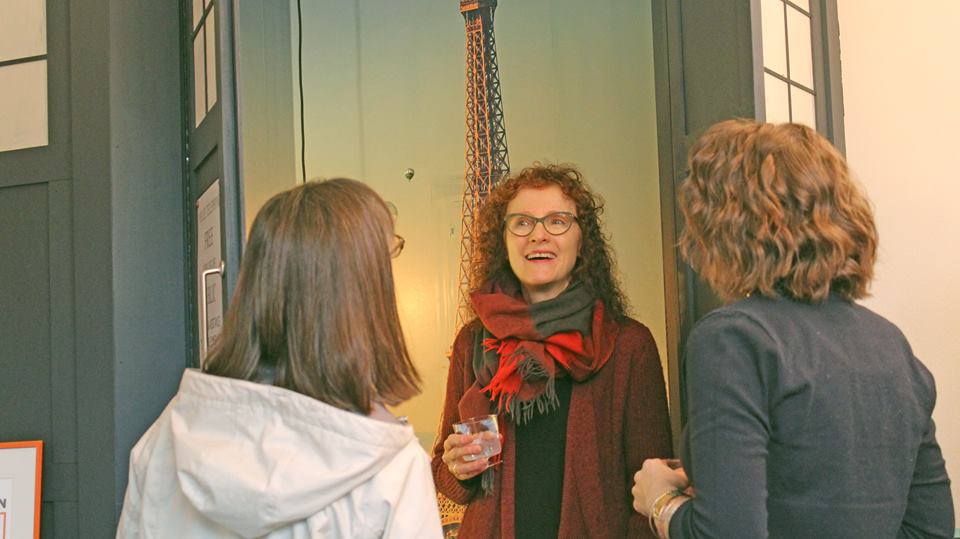
And how did I make it bigger on the inside? I hung a wall paper mural of a Parisian skyline so that just by walking into my little office I’d be transported to another time and place. It creates such a fun optical illusion, creating depth where there was once just wall. Check out the Eiffel Tower popping up from behind my friend and landscape designer Lucinda there. Doesn’t she look like she’s just discovered something bigger?!
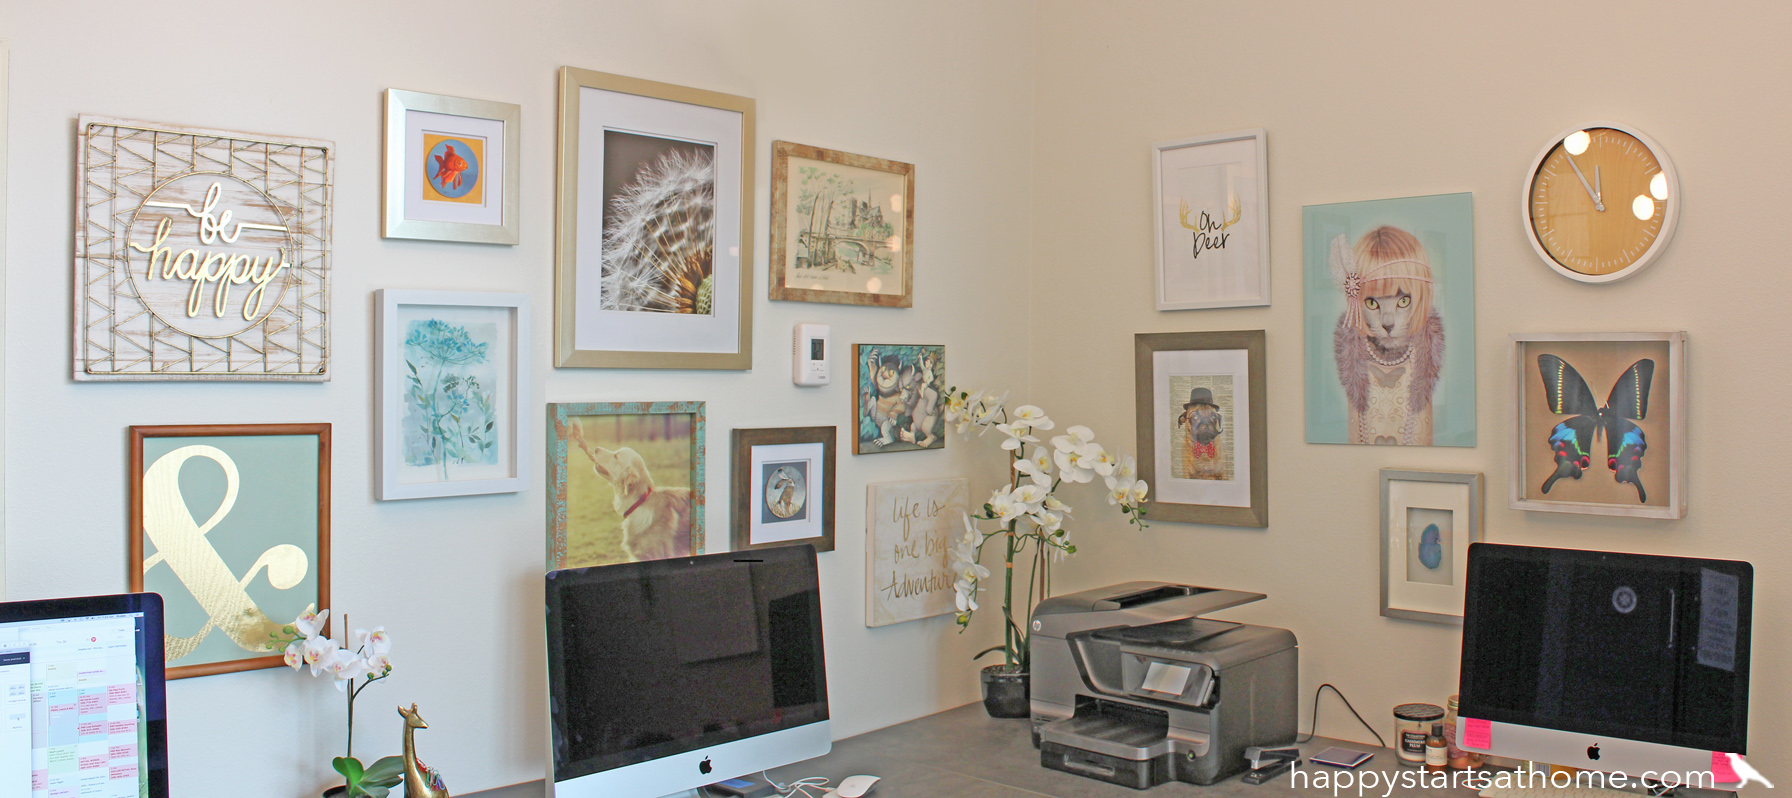
WHAT ABOUT THE REST OF THE OFFICE? With such a dominant focal point in a not-very-large space I had to consider the rest of the decorations. I needed the rest of the room to be fun, but not busy. Too keep it fun I decorated with really random, whimsical touches like sputnik-style lights, cow-hide chairs, and a gallery wall of fabulous creatures and fun sayings. But to keep it calm I kept the color palette restrained to aqua, navy and gold.
The Gallery Wall
Putting the gallery wall together was mostly an investment of time. Once I’d decided on my color palette it was a matter of collecting a few things I already loved and owned (Where the Wild Things Are came from my childhood room, the goldfish and the rabbit were both original paintings from two of my favorite artists Terry Rafferty and Maggie Vandelwalle, and I stole the “be happy” art from my guest room at home), then hitting all my treasure-hunting spots (Marshalls, TJ Maxx, Home Goods, Target, etc) to collect inexpensive wall art that fit my parameters of being about 16×16 in size, aqua, white or gold, and *delightful.* I brought maybe forty pieces back to the office and then experimented with different combinations, finally settling on what you see here. (If you do this, don’t lose your receipts! Returning what you don’t keep is an important part of sticking to a budget!)
The thing about gallery walls is that there are guidelines to setting them up (see below) but it really is more about experimentation than following an exact recipe. Don’t be afraid – just lay out things you love on the floor and keep moving them around until it looks balanced (or hire me to help ;-)
My gallery-wall guidelines:
- Treat the whole collection as one piece of art, and hang the whole collection so that the center is at about 60″ from the floor, just like you would with one large piece of art. Generally you want to be able to look into the center of your art while standing.
- Avoid the urge to hang the biggest piece in the center, and instead hang it a little off center. This will help you create a more interesting layout. Here Daisy from the Great Catsby is biased up on the wall over the printer, and the dandelion on the left wall is also up and to the right of center of the overall gallery layout.
- Keep the spacing relatively consistent between pieces. I usually have 3-5″ of space between pieces of art. This ensures that you don’t end up with any lonely pieces floating out on their own, or any pieces that are too crowded into the space.
- To make a gallery wall feel cohesive, try to restrain the color palette, or use all matching frames, or make the subjects all of similar size (like in a gallery wall of portraits you might avoid one picture of a far off picture of you as a couple – that will get lost amidst all the faces).
- Don’t be afraid to mix up the subjects and textures. Here the quotes and text break up the portraits and paintings to help keep it interesting and add a bit of playful sass, the non-matted, non-glass elements make the overall texture more interesting, and the single round clock keeps the whole thing from being too matchy.
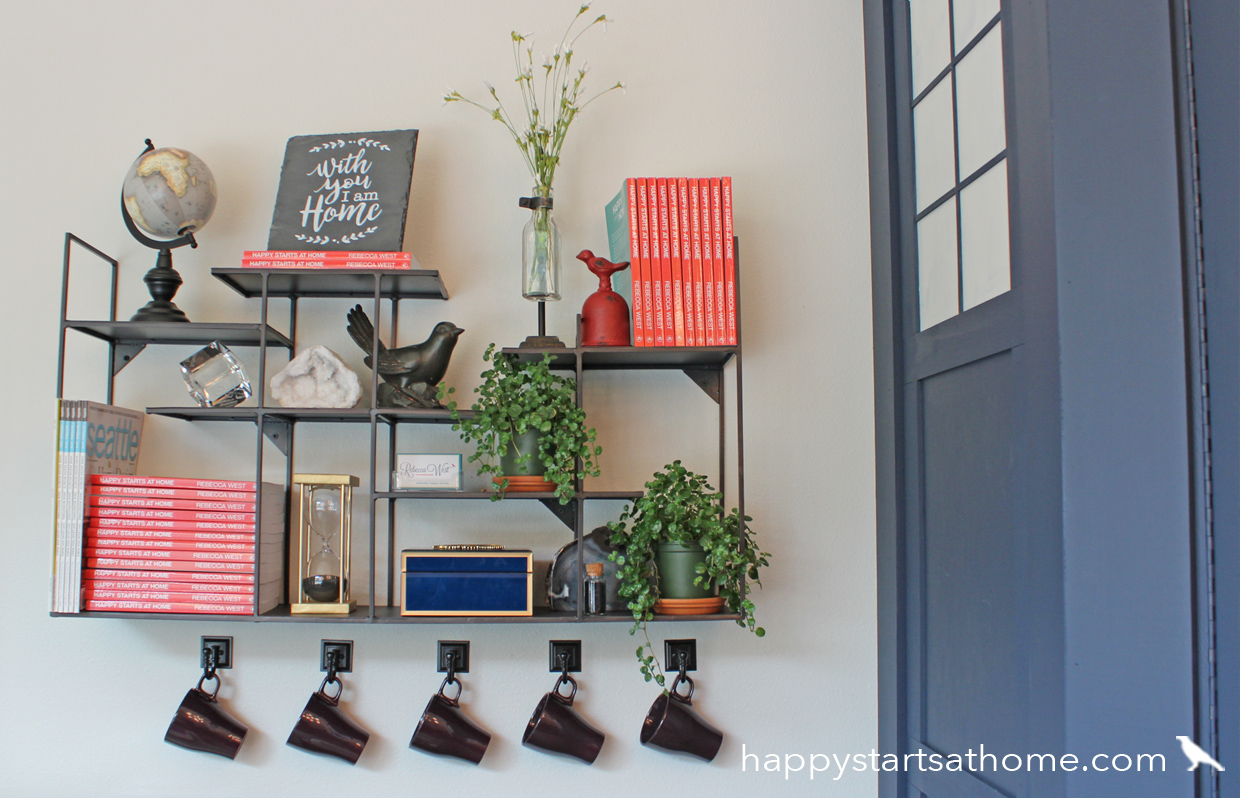
Of course, many of those guidelines also apply to staging a bookshelf or mantle, which I put to use in decorating the Scape wall shelf I installed from CB2. Here you can see the use of the restrained color palette, mix of textures, and the non-centralized focal points all at work to create one piece of art.
Any chance you get, come swing by and say hi, and get a selfie with the TARDIS! Leah will greet you with a smile any time 9ish to 1ish Monday to Friday, and if you are lucky you’ll see one or two of our other team members there, too.

Need to step it up in your workspace? While we don’t usually do commercial spaces, we do love solopreneur and work-from-home offices! Give a holler when you’re ready to give your business a new chapter whether that’s in your home, or out in the world!
MAY YOUR HOME ALWAYS BE HAPPY!

Are you ready for a seriously happy home?
(Cue the confetti!)

Eager to get happy at home right now?