Two Small Kitchens: Reimagined
Here’s another one of those projects where you might not believe your eyes when you look at the “before” and “after,” but I promise the angles and the rooms are the same!
The entire house got a long-overdue update, but here I’ll focus on the two kitchens (the main kitchen, and the kitchen in the rental unit downstairs). Both had quirky spaces that required some imagination to get right.
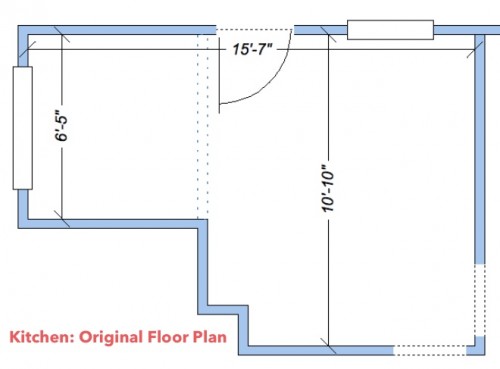
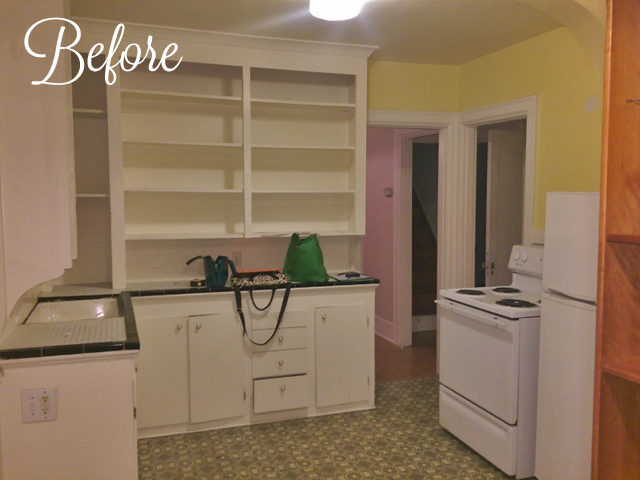
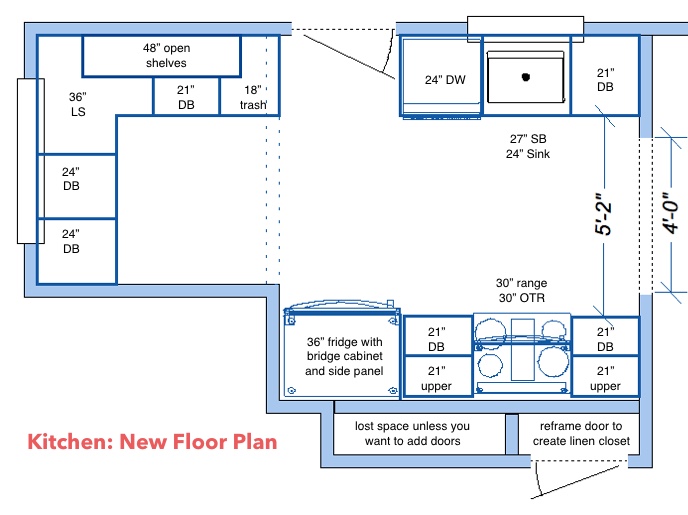
Let’s start with the main kitchen. As you see in many older bungalows, the kitchen was isolated from the rest of the house, and included a little dining alcove. The room had three doorways, and an old chimney bumped into the room, making for a complicated, cramped kitchen with limited counter space.
To make the most of the room we reclaimed that entire alcove, eliminating the decorative archway and making the nook a part of the whole kitchen. That one choice doubled the amount of counter space and storage in the room! The homeowners were nervous since that doorway to the side yard had to stay, but once it was complete they could see that the doorway didn’t really interrupt the room, and it was better to have the generous kitchen.
On the other side of the room a wall divided the kitchen from the dining room, and two doorways led into the same hall. Not only did that feel too closed off for today’s lifestyles, but the passage between the counter and the oven was too tight (not to mention unsafe and impractical with *no* counter space on either side of it).
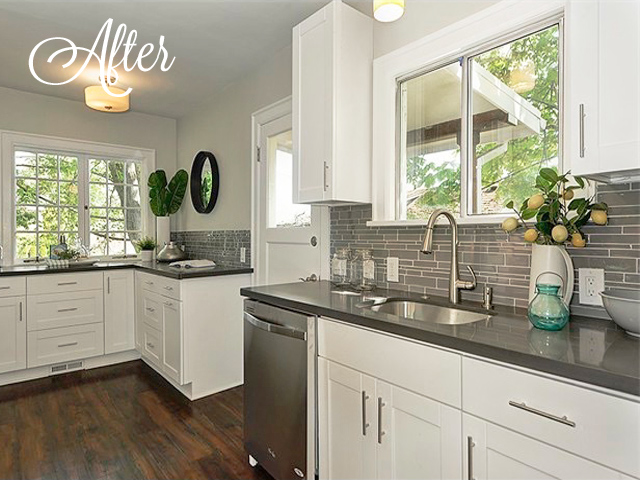
We wanted to make the space feel more open, so we widened (and moved) the doorway between the dining and kitchen, eliminated the second doorway into the hallway, and actually narrowed the whole kitchen so that the chimney bump-out became the new wall depth. We used that extra space to create hallway closets on the other side. Yes, you are looking at the same angle here in the after photo!
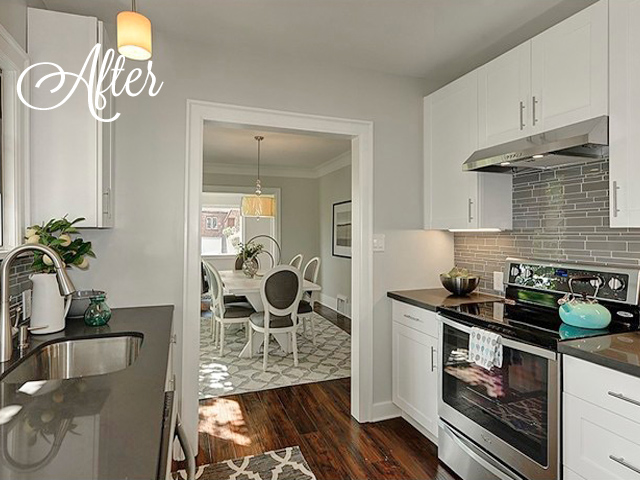
What an improvement in the main kitchen!
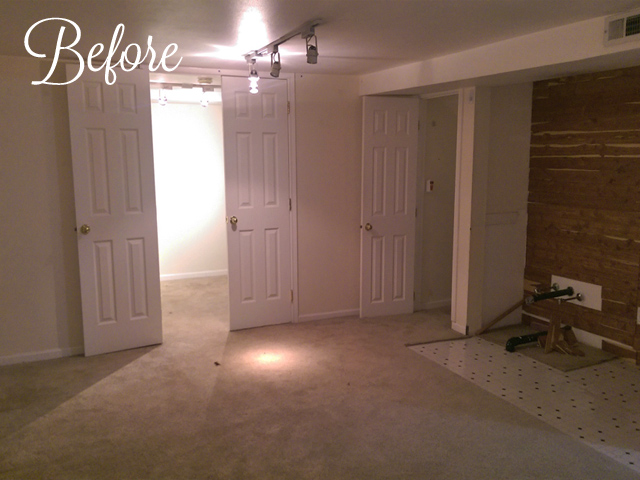
Meanwhile, downstairs the space had the potential to be an incredible rental unit, but it needed some imagination to fully realize the opportunity. Luckily it was already plumbed for a kitchen, but the layout (especially that closet in the corner) really limited the amount of space available for the kitchen. The two big issues complicating the kitchen layout were 1) the closet was under the stairs and therefore a *structural* feature and 2) the ceilings were pretty low, so creating good lighting would be a challenge, especially in the kitchen where the ducting meant we couldn’t use recessed lighting. Still, we needed to create a comfortable, inviting, well-lit space. What to do…?
We opened up that under-stair closet and designed the new kitchen layout around the post that had to stay. This way we could create an adorable L-shaped kitchen giving us more storage and counter space!
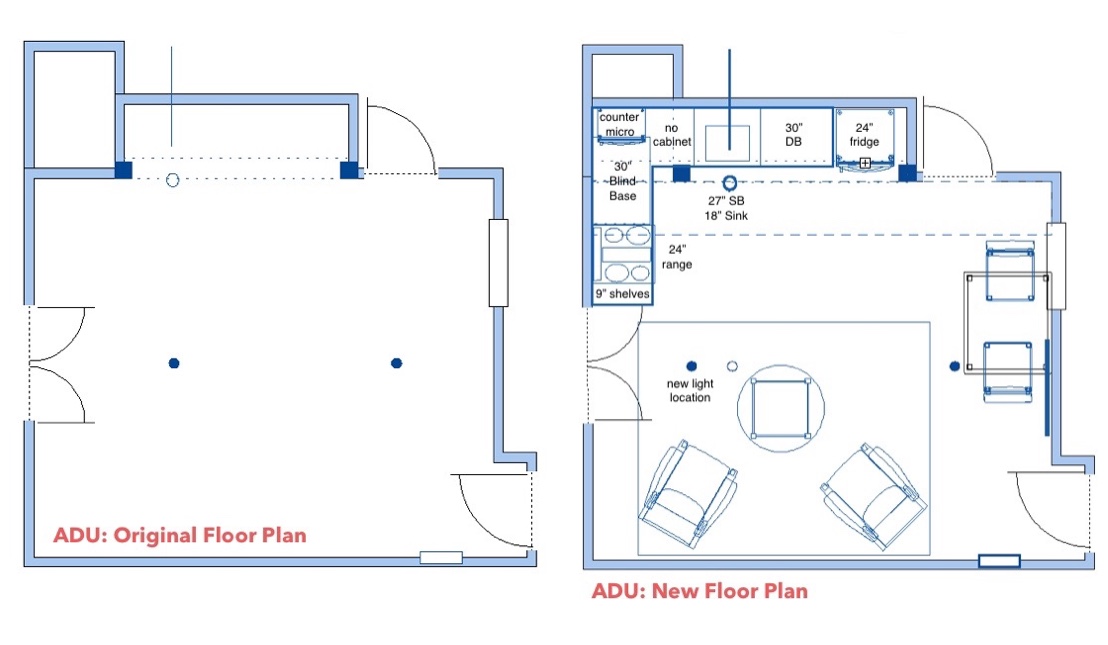
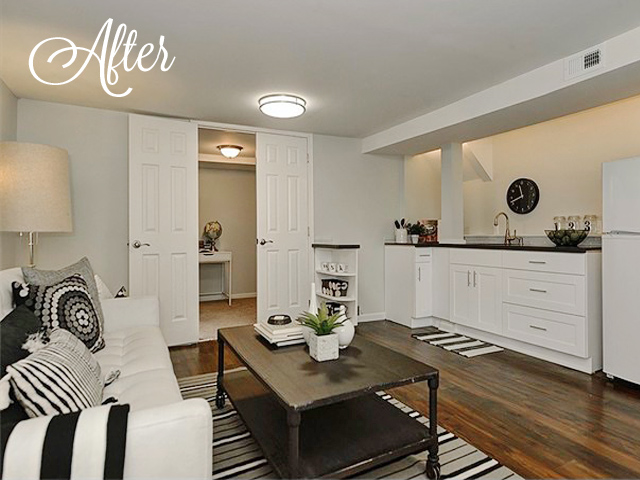
We embraced the soffit that enclosed the HVAC ducting and lit the ceiling *behind* it. Not only did that solve our problem of where to put kitchen lights, but it also created a great lighting feature! Awesome! We also eliminated the dated track-lighting which wasn’t doing a thing to light the room well. We found a very low profile (only 5″!) flush mount fixture to brighten the room and cast light on the ceiling (which always makes a room feel taller and brighter).
The rest of the home just needed a quick refresh, so for the other areas we guided the decisions on wall colors, finishes, and flooring, and left it up to the homeowners to execute a great design.
Speaking of the design, a quick note on *how* we did this project. This Seattle bungalow was actually about to go on the market, and these updates were being done to help the property get top dollar. That meant that the homeowners didn’t want to spend too much money on the design process.
They were capable DIYers, so to be efficient with their money the only in-office work we did was to create the new layouts for the two kitchens. We did a site measure, put that into our layout program, and created the floor plans. It was through that process that we were able to imagine better uses of the space in both kitchens.
After we did the layouts, we spent two QA Sessions *with* the homeowner at Lowes and selected all the tile and materials for the two kitchens and three bathrooms, and the paint and flooring for the whole house. We didn’t do any tile or cabinet elevations — instead the client worked off our floor plans and then directly with the cabinet makers and tile installers on the remaining details, saving them lots of money on the main design.
Whether your place needs a cost-efficient makeover for resale, or you’re just ready to renew your love for your old home, we can help! Give a shout when you are ready to give your house a new chapter.
To your happy home!
Rebecca
MAY YOUR HOME ALWAYS BE HAPPY!

Are you ready for a seriously happy home?
(Cue the confetti!)

Eager to get happy at home right now?